Nothing beats the smell of fresh bread baking in your own kitchen. Making homemade sandwich bread may sound complicated, but with the right recipe, ingredients, and techniques, it’s simpler than you’d think. From selecting the best ingredients to storing your bread for maximum freshness, this guide covers everything you need to make a delicious loaf that’s perfect for any sandwich filling.
Part 1: Why Make Sandwich Bread at Home?
What Makes a Great Sandwich Bread?
Let’s face it: store-bought bread can be convenient, but it often lacks the freshness and flavor of homemade bread. Making your own sandwich bread allows you to control the ingredients, avoid preservatives, and create a loaf with the exact texture and taste you love. But what exactly makes a sandwich bread great?
The ideal sandwich loaf is soft yet sturdy enough to hold fillings without falling apart. It should have a balanced crumb—moist but not too dense—so it slices easily and has just the right amount of chewiness. Plus, the flavor should be mild enough to complement anything you want to stack between two slices.
The Benefits of Baking at Home
Homemade bread offers more flavor, freshness, and flexibility than store-bought options. Plus, you get to control what goes into your loaf—no preservatives or unnecessary additives. Making your own loaf can be economical, healthier, and is a satisfying project for home bakers.
Here are a few more reasons to try a homemade sandwich bread recipe:
- Cost Savings: Baking your own bread can be more economical than buying quality bread at the store.
- Customizable Flavors: Add herbs, seeds, or honey to create unique flavors.
- Healthier Options: Use whole-grain flours, reduce added sugar, or make gluten-free variations to meet dietary preferences.
With homemade bread, you’re not just following a recipe—you’re creating a staple that can elevate every sandwich, toast, or snack it’s used in. In the next sections, we’ll dive into the essential ingredients, key techniques, and variations to help you create your perfect sandwich loaf.
Part 2: Essential Ingredients for Sandwich Bread
Flour Choices for Bread
Flour is the foundation of any good sandwich bread recipe. While you might think all flours are created equal, the type of flour you use can significantly impact the texture and taste of your bread. Most recipes call for bread flour, which has a higher protein content than all-purpose flour. This protein helps develop gluten, giving the bread a soft yet structured crumb that holds up well to sandwich fillings.
Alternatively, you can use all-purpose flour if that’s what you have on hand, but keep in mind that it may produce a slightly softer loaf. Whole wheat flour, on the other hand, adds a hearty flavor and denser texture but requires more liquid to prevent the bread from becoming too dry. Many bakers like to combine bread flour with a bit of whole wheat to get a loaf that’s both nutritious and fluffy.
Yeast and Its Role in Bread Making
Yeast is what gives bread its light and airy texture by creating carbon dioxide bubbles that make the dough rise. For this recipe, you can use active dry yeast or instant yeast. Both work well, but they behave slightly differently:
- Active Dry Yeast: Needs to be activated in warm water before mixing with the dough.
- Instant Yeast: Can be added directly to the dry ingredients, making it a bit more convenient.
When using active dry yeast, dissolve it in warm water (about 105°F to 110°F) with a pinch of sugar to get it going. You’ll know it’s ready when it becomes foamy—a sign that it’s alive and ready to leaven your bread. If you’re using instant yeast, simply mix it into the flour and other dry ingredients, and it will work just as effectively.
Adding Sweeteners and Fats
Sweeteners and fats aren’t just about flavor; they play a key role in the bread’s texture. A bit of sugar or honey feeds the yeast, helping it work faster. Additionally, sugar contributes to the golden-brown color of the crust and adds a subtle sweetness to balance the flavor.
Fats, such as butter or oil, add richness to the bread and improve its softness. Butter, in particular, gives the loaf a tender crumb, while oil can make the bread slightly chewier. Including just a tablespoon or two of fat in your recipe can make a noticeable difference, creating that soft, melt-in-your-mouth texture we all love in a good sandwich loaf.
Salt and Flavoring Additions
Salt may seem like a small addition, but it has a big impact on bread flavor. Besides enhancing taste, salt helps control yeast activity, preventing the dough from rising too quickly and helping to develop a better crumb structure. Without salt, the bread would taste bland and could overproof, resulting in an uneven texture.
For extra flavor, consider adding herbs, seeds, or spices to the dough. Poppy seeds, flaxseeds, and even a touch of garlic powder can add a unique twist to your sandwich bread recipe, making it more than just a basic loaf.
Part 3: Techniques for the Best Sandwich Bread Texture
Creating a Preferment for Added Flavor
One way to boost the flavor and texture of your sandwich bread is by using a preferment. A preferment is a simple mixture of flour, water, and a small amount of yeast that’s allowed to ferment before being added to the main dough. This step may take a few extra hours (or overnight if you prefer), but it’s well worth it, as it enhances the depth of flavor and improves the bread’s structure.
To make a preferment, mix 1 cup of flour, ½ cup of warm water, and ¼ teaspoon of yeast. Cover the bowl with plastic wrap and leave it at room temperature until it becomes bubbly and slightly deflated, indicating that it’s ready to be added to the rest of the ingredients. This method, also known as a “sponge” or “poolish,” can elevate your sandwich loaf from good to bakery-quality.
Kneading Techniques for Gluten Development

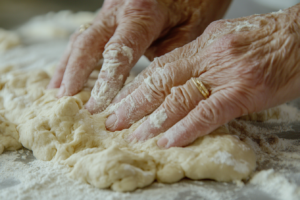
Kneading is essential in bread-making because it develops gluten, the protein that gives bread its chewy texture. Gluten creates a network of strands that trap gas bubbles, allowing the bread to rise and maintain its structure. You can knead by hand or use a stand mixer with a dough hook; both methods work well, though a mixer can save you some time and effort.
To test if your dough has been kneaded enough, use the Windowpane Test. Gently stretch a small piece of dough between your fingers. If it stretches thin enough to let light pass through without tearing, it’s ready. If it tears, knead a bit longer and test again. This step ensures your bread will have a soft yet sturdy crumb that’s perfect for sandwiches.
Bulk Fermentation and First Rise
After kneading, it’s time for the bulk fermentation, also known as the first rise. During this period, the yeast will produce gas, causing the dough to expand. This rise typically takes 1-2 hours, depending on the temperature of your kitchen. Warmer conditions will speed up the process, while cooler ones will slow it down.
To check if the dough has risen enough, gently press a fingertip into the surface. If the indentation slowly springs back, it’s ready for the next step. This first rise is crucial for developing flavor and allowing the yeast to create the structure needed for a well-risen loaf.
Shaping the Dough for an Even Rise

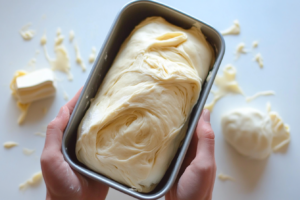
Shaping might seem simple, but it’s an important part of creating a sandwich loaf that’s uniform and attractive. Start by gently pressing the dough into a rectangle, then fold it into thirds, like a letter, and roll it up from the short side, tucking the ends under as you place it in a loaf pan. This folding and rolling technique gives the bread its shape and ensures it rises evenly in the oven.
Be careful not to handle the dough too roughly, as this could deflate the bubbles created during the first rise. A gentle touch preserves the structure and helps produce a loaf with a light, airy crumb.
Final Rise or Proofing
The final rise, or proofing, happens after the dough has been shaped and placed in the pan. This step is shorter than the bulk fermentation, usually taking around 30-45 minutes. During proofing, the dough rises again, filling out the loaf pan and preparing for baking.
Keep an eye on the dough during this stage, as over-proofing can cause the loaf to collapse in the oven. The dough should rise just above the edge of the pan and feel slightly springy to the touch. This final rise is essential for achieving that classic sandwich bread shape and a soft, pillowy texture.
Part 4: Baking the Sandwich Bread to Perfection
Choosing the Right Bakeware
The choice of bakeware can make a noticeable difference in the quality of your sandwich bread. A standard loaf pan (8.5 x 4.5 inches) works well for most recipes, producing a loaf that’s the ideal size for sandwiches. If you prefer a taller or wider loaf, adjust your pan size accordingly, but keep in mind that different sizes may affect baking time.
Metal pans conduct heat more efficiently than glass or ceramic, giving the bread a more evenly baked crust. Darker pans tend to brown the crust faster, so if you’re using a dark pan, consider reducing the baking temperature by 25°F to avoid over-browning.
Baking Time and Temperature
Most sandwich bread recipes bake at around 350°F for 30-40 minutes, though times may vary depending on your oven and the size of your loaf. Preheating the oven is essential, as this ensures the bread will bake evenly from start to finish. Place the loaf on the center rack, allowing heat to circulate evenly around the pan.
To check if your bread is fully baked, you can gently tap the top; a hollow sound typically means it’s ready. For a more accurate approach, use an instant-read thermometer. Insert it into the center of the loaf, aiming for an internal temperature of about 190°F. This ensures the bread is fully cooked without being overdone.
Adjusting for Variations in Bread Ovens
Every oven behaves a little differently, so learning how to adjust is key to achieving consistent results. If you find that your bread browns too quickly, tent it loosely with aluminum foil halfway through baking to prevent the crust from darkening too much. For bakers using a convection oven, reducing the baking temperature by 25°F can help prevent over-baking, as convection ovens circulate hot air more rapidly.
Using a baking stone under your loaf pan can also help create an even heat distribution, particularly for those who love a well-caramelized crust. With a bit of trial and error, you’ll find the settings that yield perfect results in your specific oven.
Cooling and Slicing Tips
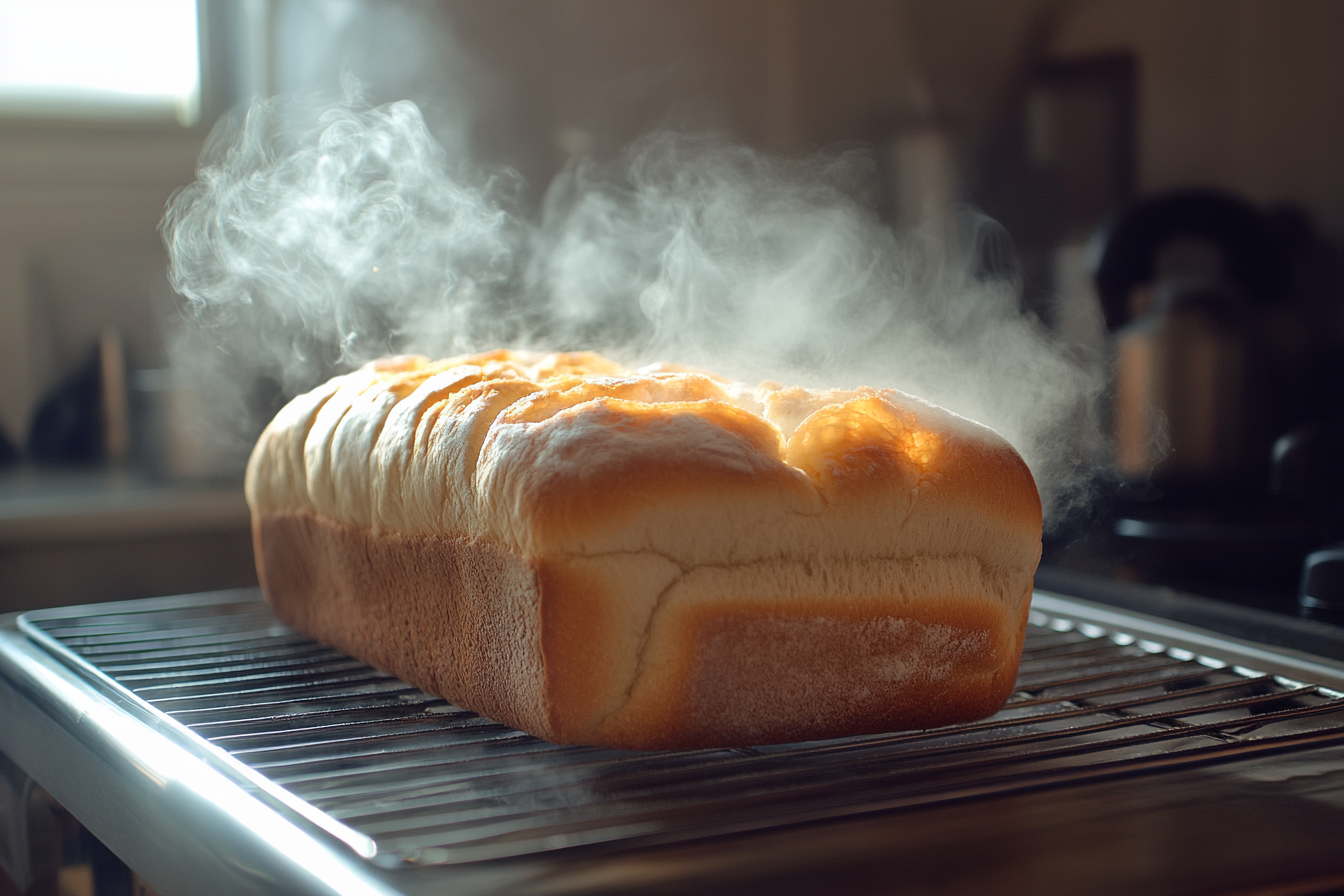
Cooling is just as important as baking when it comes to sandwich bread. Once you remove the loaf from the oven, let it cool in the pan for about 10 minutes. This short wait allows the bread to firm up slightly, making it easier to remove without tearing. Then, turn the loaf out onto a wire rack to cool completely—this prevents steam from getting trapped, which could make the crust soggy.
For the best results, wait until the bread is fully cool before slicing. Use a serrated knife to ensure clean, even slices, ideal for sandwiches. Slicing too soon can compress the crumb, so be patient—your perfect sandwich bread will be worth the wait.
Part 5: Common Variations of Sandwich Bread
Whole Wheat Sandwich Bread
For those who love a more wholesome loaf, whole wheat sandwich bread is a fantastic option. Whole wheat flour adds a rich, nutty flavor and a slightly denser texture due to its higher fiber content. However, whole wheat dough often requires a bit more hydration since the bran in the flour absorbs more water. Adding a tablespoon of honey or molasses not only boosts flavor but also helps tenderize the loaf.
To make whole wheat bread softer, consider using a combination of whole wheat and bread flour, or adding a tablespoon of oil or butter. This will help retain moisture, giving you a loaf that’s both nutritious and perfect for sandwiches.
Gluten-Free Sandwich Bread
For those on a gluten-free diet, making gluten-free sandwich bread at home can be a game-changer. This variation uses a combination of gluten-free flours such as rice flour, tapioca starch, and potato starch to mimic the texture of traditional bread. Since gluten-free flours lack the elasticity that gluten provides, adding a binder like xanthan gum or psyllium husk is essential for structure and stability.
The dough for gluten-free bread tends to be stickier and less elastic, so it’s more like a batter than a traditional dough. With the right ingredients, however, you can achieve a loaf that’s soft, airy, and deliciously sliceable for sandwiches.
Sweet Sandwich Breads (Honey, Milk Bread)
If you enjoy a touch of sweetness in your bread, consider making a honey sandwich bread or milk bread. Adding honey, maple syrup, or sugar provides a slightly sweet undertone, which pairs beautifully with peanut butter, jam, or even savory fillings.
Milk bread, popular in Japanese baking, uses milk and sometimes tangzhong (a flour-water paste) to create an exceptionally soft, tender crumb. The addition of milk enriches the dough, making it soft and pillowy, ideal for toast or sandwiches.
Sourdough-Based Sandwich Bread
For a rustic, flavorful twist, try incorporating a sourdough starter into your sandwich bread recipe. Sourdough adds a slight tang and an extra layer of flavor to the bread, while the natural fermentation helps improve its texture.
To make a sourdough-based sandwich bread, replace the yeast with a sourdough starter and allow for a longer fermentation time. You may need to adjust hydration levels slightly, as sourdough starters add extra liquid to the dough. With a little patience, sourdough sandwich bread can become a delightful staple in your baking rotation, offering a more complex flavor profile for your favorite sandwiches.
Part 6: Troubleshooting Common Bread Issues
Why Is My Bread Dense?
A dense loaf can be frustrating, especially when you’re aiming for a light, fluffy sandwich bread. A dense texture is often due to under-kneading, which prevents gluten from developing fully. Without enough gluten, the bread lacks structure, resulting in a compact crumb. Another reason might be under-proofing, where the dough hasn’t had enough time to rise fully before baking.
To fix this, make sure you knead the dough adequately, whether by hand or with a stand mixer, until it passes the Windowpane Test. Allow enough time for the dough to rise properly—patience is key to achieving a light, airy loaf.
Dealing with Crust and Texture Issues
If your bread has an overly hard crust or an unexpectedly soft center, it could be due to baking temperature and time. A hard crust can occur if the oven is too hot, causing the outer layer to cook faster than the inside. On the other hand, a soft or slightly doughy center indicates that the bread didn’t bake long enough.
To remedy this, check your oven temperature with an oven thermometer to ensure accuracy. If the crust is browning too quickly, tent the loaf with aluminum foil halfway through baking. For an even bake, always follow recommended baking times and temperatures, and use an instant-read thermometer to verify that the internal temperature has reached about 190°F.
Fixing Flavor Issues (Yeasty, Bland)
If your bread tastes too yeasty or overly bland, there are a few adjustments to consider. An excessively yeasty flavor is usually due to too much yeast or insufficient fermentation time, as the yeast hasn’t had enough time to mellow out. Using the right amount of yeast and allowing for longer proofing can balance the flavors.
Bland bread, on the other hand, often needs just a little more salt or a slight increase in sweeteners, like honey or sugar, for added depth. Remember, salt enhances flavors and helps regulate yeast activity, so don’t skimp on it!
Problems with Rising and Shaping
If your bread doesn’t rise as expected, several factors could be at play. One common issue is inactive yeast, which can occur if the yeast is old or the water used to activate it is too hot, killing the yeast. Another potential cause is under-proofing, which leaves the dough with insufficient gas for a full rise.
Make sure to use fresh, properly stored yeast, and activate it in lukewarm water to ensure it’s alive. Also, give the dough ample time to rise until it’s doubled in size, and handle it gently during shaping to avoid deflating the dough. By following these tips, you’ll be well on your way to achieving a well-risen, beautifully shaped loaf of sandwich bread.
Part 7: Storing and Freezing Sandwich Bread

Room Temperature Storage
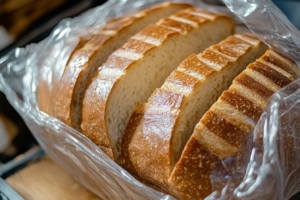
If you plan to eat your sandwich bread within a few days, storing it at room temperature is often the best option. Keep the loaf in a bread bag, bread box, or tightly wrapped in plastic wrap to protect it from air, which can dry it out. Avoid storing bread in the refrigerator, as the cool temperature can actually speed up the staling process, making your bread dry and less enjoyable.
For an added layer of freshness, place a small piece of parchment paper between the bread and the wrap to help retain moisture. Properly stored at room temperature, homemade sandwich bread usually stays fresh for about 3-4 days.
Refrigerating vs. Freezing Bread
Refrigerating bread can cause it to go stale faster, but freezing is a fantastic option if you want to extend the shelf life of your sandwich bread. To freeze, wrap the loaf or individual slices tightly in plastic wrap, then add a layer of aluminum foil or place them in a freezer-safe bag. This double-layer approach prevents freezer burn and helps preserve the bread’s flavor and texture.
Frozen bread can last for up to 3 months and is best when thawed overnight in the refrigerator before bringing it to room temperature. For the freshest results, toast or reheat the thawed slices slightly to revive their texture.
Tips for Thawing Frozen Bread
When you’re ready to enjoy your frozen bread, thawing it properly can make all the difference in its texture and taste. The easiest way to thaw bread is to move it from the freezer to the fridge the night before you plan to eat it. Allowing the bread to thaw slowly helps maintain its soft crumb and prevents sogginess.
If you’re in a hurry, you can also thaw individual slices at room temperature for about 15-20 minutes, then toast them for a few seconds to restore their freshness. This method is perfect for sandwiches, as it keeps the bread soft on the inside with a light crispness on the outside. With the right storage and thawing techniques, your homemade sandwich bread will taste as fresh as the day you baked it!
Part 8: Creative Serving Ideas for Sandwich Bread
Classic Sandwich Pairings
Your homemade sandwich bread is versatile and can elevate classic sandwiches to a new level. Here are some beloved combinations to try:
- Turkey and Avocado: Layer sliced turkey, creamy avocado, lettuce, and a touch of mustard on your freshly baked bread for a satisfying, protein-packed sandwich.
- Grilled Cheese: A classic grilled cheese with melted cheddar and a sprinkle of garlic powder brings out the softness and flavor of homemade bread, especially when toasted to perfection.
- Peanut Butter and Banana: For a sweet and nutritious treat, spread peanut butter over a slice of sandwich bread and top with sliced bananas. Add a drizzle of honey for extra sweetness.
Toasting and Using Leftover Bread
If you have leftover sandwich bread, don’t let it go to waste! Here are a few ways to make the most of every slice:
- Croutons: Cube the bread, toss with olive oil and herbs, and bake until golden. These homemade croutons are perfect for salads and soups.
- French Toast: Dip slices in a mixture of eggs, milk, and cinnamon, then cook until golden brown. French toast made with homemade bread is extra fluffy and delicious.
- Bread Pudding: Mix cubed bread with a custard base, add a few spices, and bake for a comforting dessert that makes use of older bread.
Open-Faced Sandwich Ideas
Open-faced sandwiches are a fantastic way to showcase the quality of your sandwich loaf while piling on creative toppings. Here are a few to try:
- Avocado Toast: Spread mashed avocado over toasted bread, sprinkle with salt, and add toppings like sliced tomatoes, radishes, or a poached egg for a satisfying snack or breakfast.
- Tuna Melt: Spread tuna salad on a slice of bread, top with cheese, and broil until melted and bubbly.
- Bruschetta: Rub toasted bread with garlic, then top with diced tomatoes, basil, olive oil, and a dash of balsamic vinegar for a fresh, Italian-inspired treat.
These serving ideas make the most of your homemade sandwich bread, ensuring that every crumb is enjoyed to its fullest. Whether you prefer savory or sweet, these simple but delicious options highlight the versatility of your freshly baked bread.
Part 9: Frequently Asked Questions (FAQs) about Sandwich Bread
To help with common questions and troubleshoot potential issues, here’s a comprehensive FAQ section about sandwich bread.
What Is the Best Flour for Sandwich Bread?
For most sandwich bread recipes, bread flour is recommended due to its higher protein content, which aids in developing gluten, resulting in a softer and more structured crumb. However, all-purpose flour can also work, though it may yield a slightly softer loaf. For a more nutritious twist, try using whole wheat flour, though you may need to add extra hydration to prevent the bread from drying out.
How Can I Make My Bread Softer?
To make softer sandwich bread, incorporate a bit of fat, such as butter, oil, or even milk. These ingredients enrich the dough, creating a tender crumb. Additionally, consider using a tangzhong or a small amount of potato flour, both of which help retain moisture and create a soft texture that’s perfect for sandwiches.
Why Didn’t My Bread Rise?
If your bread didn’t rise as expected, the yeast might be the issue. Ensure that your yeast is fresh and that you activate it in lukewarm water (around 105°F) if using active dry yeast. Also, check the dough’s environment; a warm, draft-free place encourages optimal rising. Cold or overly warm areas can inhibit yeast activity and affect the rise.
How Long Will Homemade Sandwich Bread Last?
Homemade sandwich bread typically stays fresh for about 3-4 days when stored at room temperature in an airtight container or bread bag. If you need to keep it longer, consider freezing individual slices or the whole loaf, which can extend its shelf life to up to 3 months.
Can I Make Sandwich Bread Without a Mixer?
Yes! While a stand mixer can make the kneading process easier, sandwich bread can certainly be made without one. Knead the dough by hand on a lightly floured surface for 10-12 minutes, or until it passes the Windowpane Test. This process may take a bit more effort, but it’s fully achievable and just as effective.
Part 10: Wrapping Up: Mastering Homemade Sandwich Bread
Homemade sandwich bread isn’t just about following a recipe—it’s about experimenting with ingredients, learning techniques, and discovering what makes bread soft, flavorful, and satisfying. From understanding the roles of flour, yeast, and fats to learning how to knead, shape, and bake, this guide provides everything you need to bake a perfect loaf.
With practice, you’ll be able to create bread that’s not only fresh and delicious but also versatile enough for any sandwich, toast, or meal you can imagine. Enjoy every slice and the satisfaction that comes with making your own perfect sandwich bread!


4 thoughts on “Sandwich Bread Recipe: Easy Steps for Perfect Homemade Bread”